• This is default featured slide 1 title

    Go to Blogger edit html and find these sentences.Now replace these sentences with your own descriptions.This theme is Bloggerized by NewBloggerThemes.com.

  • This is default featured slide 2 title

    Go to Blogger edit html and find these sentences.Now replace these sentences with your own descriptions.This theme is Bloggerized by NewBloggerThemes.com.

  • This is default featured slide 3 title

    Go to Blogger edit html and find these sentences.Now replace these sentences with your own descriptions.This theme is Bloggerized by NewBloggerThemes.com.

  • This is default featured slide 4 title

    Go to Blogger edit html and find these sentences.Now replace these sentences with your own descriptions.This theme is Bloggerized by NewBloggerThemes.com.

  • This is default featured slide 5 title

    Go to Blogger edit html and find these sentences.Now replace these sentences with your own descriptions.This theme is Bloggerized by NewBloggerThemes.com.

Welcome to our website

Lorem ipsum eu usu assum liberavisse, ut munere praesent complectitur mea. Sit an option maiorum principes. Ne per probo magna idque, est veniam exerci appareat no. Sit at amet propriae intellegebat, natum iusto forensibus duo ut.
  • Fully Responsive

    • Lorem ipsum dolor sit amet, test link adipiscing elit. Nullam dignissim convallis est lone part
  • Friendly Support

    • Lorem ipsum dolor sit amet, test link adipiscing elit. Nullam dignissim convallis est lone part
  • Maximum Results

    • Lorem ipsum dolor sit amet, test link adipiscing elit. Nullam dignissim convallis est lone part
  • Super image

    • Lorem ipsum dolor sit amet, test link adipiscing elit. Nullam dignissim convallis est lone part Read More

How to install TWRP Recovery & ROOT Redmi Note 6 Pro

How to install TWRP Recovery & ROOT Redmi Note 6 Pro


The Redmi Note 6 PRO is latest smartphone form the Xiaomi and many users already bought this phone and most of them want to install TWRP recovery on the Redmi Note 6 Pro and Root Redmi Note 6 Pro. But to do these things first you have to unlock the bootloader for Redmi Note 6 Pro. We already made a guide on that how to unlock the bootloader of Redmi Note 6 pro. So here today in this tutorial we will show you how you can easily install the TWRP custom Recovery on the Redmi Note 6 Pro and Root the Xiaomi Redmi Note 6 Pro with magisk Manager.
Once the TWRP custom recovery is installed on the phone you can install custom ROMS, install modded Zip files and Install so many things on your phone. Which you can use on the stock recovery. We already did the same with our redmi Note 6 Pro and after that, we enabled the Camera2Api on our Phone and install the latest Google Camera on the Redmi Note 6 Pro. So TWRP has many benefits, if you are interested then follow the below mention guide and install TWRP Recovery & ROOT Redmi Note 6 PRO.
INSTALL TWRP & ROOT REDMI NOTE 6 PRO
Table of Contents [show]

How to Install TWRP and ROOT Redmi Note 6 Pro

Warning: e tech shiksha is not responsible for any damage that might happen to your phone during this process. You’ll lose all your data upon unlocking bootloader.
The rooting process is not that easy, it takes some and some patience. So read all the steps very carefully and follow all of them one by one. One wrong step and you will brick the phone.

Why To Root Redmi Note 6 Pro

With the help of rooting you will do lots of things on your device like Install Custom Roms, improves the battery performance of your device, remove unwanted system applications, install tweaks and other modification on your device easily and enjoy a lot of free rooted application on your device.
In simple word, we can say rooting gives you the administrator-level permissions on your device and customize your device as per your need which is impossible for a normal android. Check out some other benefits of Rooting the Android phone. 

Pre-Requirements to Root Redmi Note 6 Pro

1. Install the ADB and USB Driver on your Windows PC from here.
2. Enable USB debugging on your Android device. To do this go to your Settings -> About Phone ->  Now Tap on the MIUI version 7-8 Times until you see a toast message “Developer option enabled”.
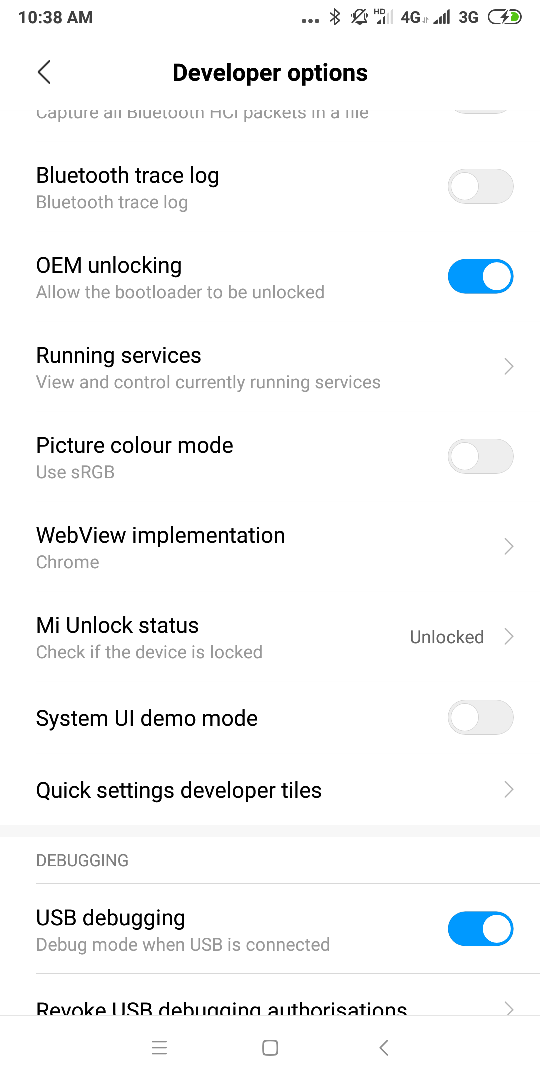
Now go back to settings -> Additional Settings -> Developer Options -> Enable the OEM Unlock by going to Settings -> Developer Option and Enable OEM Unlock and USB Debugging. See the screenshot below.
3. Install Xiaomi USB drivers, tutorial: Download Xiaomi USB Drivers For Windows

How to Unlock Bootloader Of Redmi Note 6 Pro

Unlocking bootloader of the phone is not a difficult task all you have to download Mi Unlock Tool and you can easily unlock your phone.
Here is the full guide to Unlock Bootloader Redmi Note 6 Pro.
Once the bootloader of the phone is unlocked you can easily root the phone. Follow the below mention guide to Root the device.

Download File To Root the Redmi Note 6 Pro

  • Download the ADB drivers here. Unzip the folder on your Windows C Drive. (C:\platform-tools). And you will see the PlatForm folder on your Windows C Drive.
  • Download the Disable_Dm-Verity_ForceEncrypt.zip and save the file on Desktop.
  • Download the TWRP image file here. And save the file in the platform-tools folder
  • Download the Magisk manager zip here to root the phone. Save the zip file in the phone’s internal memory

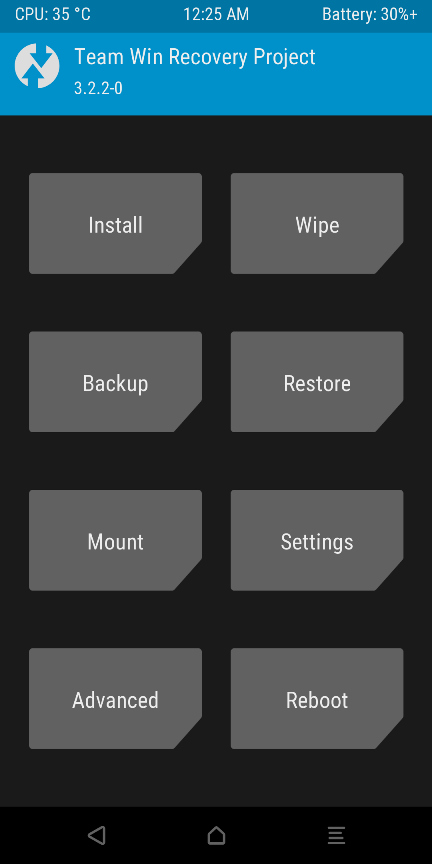
Install TWRP on the Redmi Note 6 Pro

1. Boot your phone in the fastboot mode. To do this first switch off your phone and Hold volume down + power on at the same time.
2. Now your phone will boot in the fastboot mode. Connect your phone to the PC with USB cable.
3. Now open the command prompt window in the Platform ADB folder by Pressing Shift Button and Select Open Command Window Here.
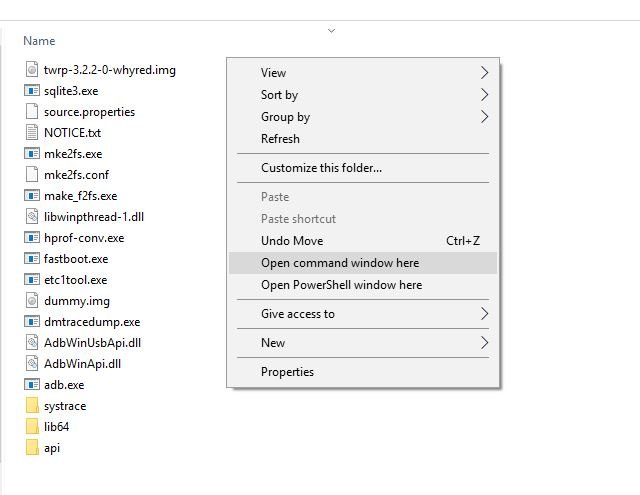
4. Now the command prompt windows will open on your windows desktop. And enter the following command.
fastboot flash recovery tuliprecovery.img
6. TWRP recovery is successfully installed on your phone. Now time to boot in TWRP mode. Run the following command.
fastboot boot tuliprecovery.img
7. Now the phone is booted in the TWRP mode. And it will ask you for the password.
8. Tap on the cancel button, go to wipe > advanced wipe and Wipe Data only.
9. Reboot to recovery and connect your phone the PC and save the DisableForceEncryption,zip on your phone.
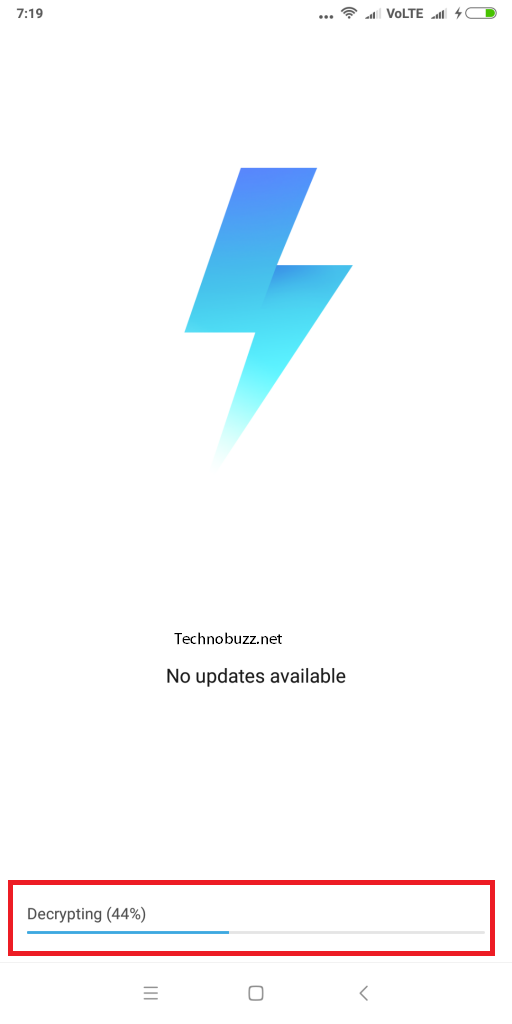
10. Now tap on the install Button and install the Disable_Dm-Verity_ForceEncrypt.zip file.
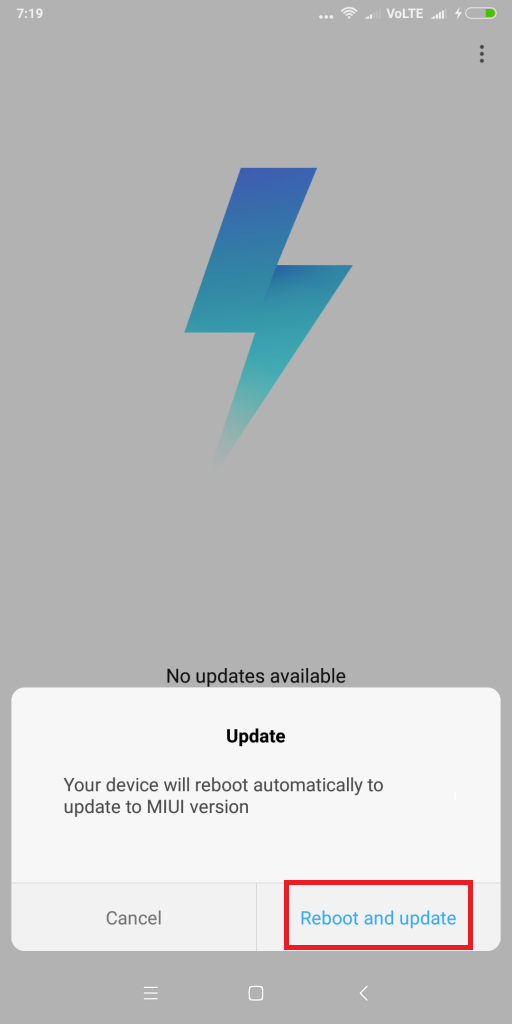
11. Now you are done. Reboot System.

How to Root Note 6 Pro phone

1. Boot your phone TWRP mode and save the magisk zip file on your phone.
2. Tap on the install button from recovery to root the phone.
Install TWRP
3. Now from the next page choose the magsik zip file.
choose the magsik zip file
4. Now to flash the file, “Swipe to Confirm Flash”
Swipe to Confirm Flash
5. Once the Zip file is successfully installed on your phone. Reboot System.
Reboot System
Now Your Redmi Note 6 Pro is rooted and TWRP is installed.
Share:

Google Camera with Night Mode for Redmi Note 6 Pro


Google Camera with Night Mode for Redmi Note 6 Pro


Redmi Note 6 Pro is one of the newest phones from the Xiaomi and Many users already bought this device. Now many of them want to install the Google Camera on Redmi Note 6 Pro, Same like the Redmi Note 5 Pro user are enjoying Google Pixel 3 Camera on their devices. So here in this guide, we will show you how to install Google Camera on Redmi Note 6 Pro. Currently, to install the Google Camera on Note 6 pro you have to unlock the bootloader of the Phone and install the TWRP custom recovery on the Redmi Note 6 Pro.
No Doubt Google Camera is one of the best camera and with the help of GCam you can click great pictures on low light Condition too. So every other mobile phone users want to install the Google Camera on their device. In this guide, you have to just install one zip file on your phone with the help of TWRP custom Recovery and after that, you can install your favorite Google Camera on the Redmi Note 6 Pro. Right Now this method will work only with TWRP custom recovery, but very soon we will come with the new guide which doesn’t need the TWRP and not even break the OTA updates on your phone.
Google Camera
So without wasting the time lets get started and download the google camera on the Redmi Note 6 Pro. Do take the full backup of your phone, if something goes wrong then you can restore your files on the phone. So let’s get started and download the Google camera on Your MIUI 10 Redmi Note 6 pro phone.
Table of Contents [show]

Download Google Camera for Redmi Note 6 Pro

This guide is only for the Redmi Note 6 Pro users. And don’t try this method on any other Xiaomi Phones. Read all the instruction very carefully and follow all of them one by one on your device to successfully install the Google pixel 3 Camera on Redmi Note 6 pro.

Pre-Requirement to Install Google Camera

Steps to Install Google Camera on Redmi Note 6 Pro

1. Save the Camewra2Api Zip file on your Redmi Note 6 Pro internal memory.
2. Now boot your phone in TWRP custom Recovery mode. To do this first switch off your phone, now hold the Volume Up + Power Button together.
3. Now your Phone will Boot in the TWRP mode.
4. From here Tap on the Install button and locate the Camera2Api zip filethat you save on your phone in step 1.
5. Flash that file on your phone.
6. Once the flashing process is completed. Reboot system.
7. Now your phone is booted. Open the Files manager and install the Google Camera apk file on your phone.
8. Now you can enjoy Google Camera on your Redmi Note 6 Pro.
Share:

Download MIUI 10 Global Public Beta on Xiaomi Phones with Updater App [8.9.20]

Download MIUI 10 Global Public Beta on Xiaomi Phones with Updater App [8.9.20]

MIUI 10 Global Public Beta or MIUI 10 Global Open beta is now released for most of the Xioami phones. A few days back Xiaomi released the MIUI 10 Global Closed beta for the beta testers which a normal user does not able to install with the updater app. And most of the Redmi Note 5 Pro users want to install the MIUI 10 Global beta on their phones. But those are the Global closed beta for the beta testers and not the Opened Global Public Beta. So to install those beta version you have to unlock the bootloader of the phone and install the TWRP on your phone.
Now the MIUI 10 Global Public Beta is available for the many devices and here we will tell you how to install the same on your phone without unlocking the bootloader and Installing the TWRP. All you have to do is download the full zip file of the MIUI 10 Global Public Beta for your phone and install with the System Update app.
MIUI 10 Global Public Beta
Below we are sharing the link of the MIUI 10 Global Public Beta for Xiaomi Phones. We are going to update this list soon when the new version is available for your phone. Currently, the new Opened Public betta of MIUI 10 is available for few phones. Soon it will be released for some other phones and we will update the list. Read the below mention guide very carefully and this guide will work with the Update app. But before following the guide do take the full backup of your phone.
Table of Contents [show]

Download MIUI 10 Global Public Beta

As we already mentioned above this is the Public Open Global Beta MIUI 10 and comes with all the latest Google Apps and this is not the Chinese version. The MIUI 10 is still in beta stage and you will find some bugs on the ROM. The rom is for the testing purpose and not the stable One. The Global MIUI 10 Stable will release at the end of August month. If you want to test this ROM on your phone then read this guide very carefully.

MIUI 10 Global Public Beta Update Schedule and Supported Devices

Many users have been asking for a specific release date of the devices. So as per the MIUI team here is the list of the devices which will get the MIUI 10 Global Public Beta. But it is only an expected release date. The final release date will be adjusted according to the specific condition. We will keep you updated.
The first batch of devices will receive MIUI 10 Global Public Beta ROM in early July 2018. The following devices are included in this batch:
  • Xiaomi Mi 6
  • Xiaomi Mi 5
  • Xiaomi Mi MIX 2
  • Xiaomi Mi MIX 2S
  • Xiaomi Mi MIX
  • Xiaomi Redmi S2
  • Xiaomi Redmi Note 5 Pro
  • Xiaomi Redmi Note 5
  • Xiaomi Mi Note 2
The following devices are included in the second batch, and will receive the ROM in late July 2018:
  • Xiaomi Redmi Note 4X, Xiaomi Redmi Note 4 (Qualcomm)
  • Xiaomi Redmi Note 5A
  • Xiaomi Redmi Note 5A Prime
  • Xiaomi Mi 5s
  • Xiaomi Mi 5s Plus
  • Xiaomi Mi Max 2
  • Xiaomi Mi Max
  • Xiaomi Mi Max Prime
  • Xiaomi Redmi 5
  • Xiaomi Redmi 5A
  • Xiaomi Redmi 5 Plus
  • Xiaomi Redmi 4A
  • Xiaomi Redmi 4X
The following devices are included in the third batch, and are expected to receive the Public Beta ROM in early August 2018:
  • Xiaomi Mi 3/Mi 4
  • Xiaomi Redmi Note 3 Qualcomm
  • Xiaomi Redmi 3S/3X

MIUI 10 Global Public Beta ROM download links


Redmi 3S/Prime 8.9.20
Recovery ROM 1281M b66b5e74f4985e6ff9b7a864b2166f12
Fastboot ROM 1496M edcf7edb24b5d0e200b0a886c1549fcd
Redmi Note 3 8.9.20
Recovery ROM 1270M eaa5b9412d1bcfe7fbc05ab1815a5e8e
Fastboot ROM 1487M 7e83ad3278481d5c3cf1736c270e693a
Redmi 4 8.9.20
Recovery ROM 1314M 3219de02e5b3729a8fa0044e39bb7066
Fastboot ROM 1787M 19d2aceef260c4a25f2c664c3a45eb6e
Mi Max 32G 8.9.20
Recovery ROM 1499M 645f3098ad49193d2221f560f856e71b
Fastboot ROM 1713M ff24c68328d6dd15652605360694df62
Mi Max 64G/128G 8.9.20
Recovery ROM 1500M 635ae4f2c8c79288e73d6946cdbea6d5
Fastboot ROM 1714M 66b30c37931d16e288008cec4dcbb30f
Redmi 4A 8.9.20
Recovery ROM 1319M b521573e7238726ac65ff65352c96611
Fastboot ROM 1802M 387d48b9e316a4e4c85c9e0ba6abb05e
Redmi Note 4 8.9.20
Recovery ROM 1513M 42393f30333b2974ce4f181a43881103
Fastboot ROM 1997M 7588b18bf6f69a3c86db0192e44585a7
Mi Max 2 8.9.20
Recovery ROM 1637M 91d2e02c2f617d8fd6a31e354c521d68
Fastboot ROM 2148M 63cd86b8aa86953710da8a8c5b25b5ff
Redmi Y1 LITE 8.9.20
Recovery ROM 1266M 87c99ea2020f7497971239d21b4f7e68
Fastboot ROM 1839M c9d98eccc7b99bda866251795467d2ac
Redmi Y1 8.9.20
Recovery ROM 1272M b04b341461bfb96ad36c5c583b891f98
Fastboot ROM 1887M 76fa62c0b44331bcce7715685e67f770
Redmi 5 8.9.20
Recovery ROM 1417M 0024d092577f1e79b36aba4d21b82a60
Fastboot ROM 2091M 4eb6e097437b2fec16d19363ad4e55ef
Redmi Note 5 8.9.20
Recovery ROM 1422M da8465e6ae2657781f70b0adb1d924df
Fastboot ROM 2241M 7ab7b5d820ea4792b027f28cc9a2b7e5
Mi MIX 2 8.9.20
Recovery ROM 1652M 33fea793c0ff3a01f754cd6e84a2f7e9
Fastboot ROM 2100M f2ee1d4186d4c65d1fa2746c6ebc2352
Redmi Y2 8.9.20
Recovery ROM 1326M 192d8b1e667dd2d575c271d9eb143881
Fastboot ROM 2048M 0a890284e6d864b3baebf6cbffadd26b
Redmi Note 5 Pro 8.9.20
Recovery ROM
Fastboot ROM 2548M d25099867c75a2e07375389bed52cade
Mi 5 8.9.20
Recovery ROM 1437M 743b9307636e6898bb686c3e32773d5b
Fastboot ROM 1655M 5c9d94a79dd03751574bf70743af72e2
POCO F1 8.9.20
Fastboot ROM 2601M fd5f606354084a89bf0b0533538d3b96
Redmi 6 Pro 8.9.20
Recovery ROM
Fastboot ROM 2301M 6506957eb0535563d22fa30c6a1f38de

How to Install MIUI 10 Global Public Beta

As you see above that in the download section there is two type of files. Recovery and fastboot. To install the Recovery all you have to use the Phone. And to install the Fastboot ROM you have to use Computer and MI Flash tool.
Below are the two different guide one for recovery and one for fastboot. Choose as per your choice. Which one you want to use on your phone. For Fastboot you have to unlock the bootloader on some Xiaomi phones.

Install MIUI 10 Global Public Beta Recovery ROM

1. Save the MIUI 10 Global Public Beta Recovery zip file on your phone’s internal memory and remember the location of your file. Make sure the ZIP file is in the root directory of your phone, not in the folder.
2. Now time to flash the zip file on your phone. Go to Settings of your phone > About Phone > System Update. From here click the ‘…’ the icon at the top-right corner, and “Choose Update package”. See the screenshot below.
Download-MIUI-10-Global-Public-Beta
3. Now the file manager will open on your device, from here select the MIUI 10 Global Public Beta Recovery zip file that you saved on your phone.
Download-MIUI-10-Global-Public-Beta
4. Now the phone will check the ZIP file and collect the info about the ROM.
Download-MIUI-10-Global-Public-Beta
5. Once completed, you will see the option to update your phone. Hit the reboot button to apply this MIUI 10 Global Public Beta update on your Xiaomi Phone.
MIUI-10-Global-Public-Beta
6. Now the phone will reboot and you will see the updating process on your phone screen.
7. After all the process gets completed your phone will reboot automatically and keep patience because it will take around 15 minutes to make the device booted up once the updating process gets completed.
Voila. Now your phone running on the latest MIUI 10. Enjoy !!!

Install MIUI 10 Global Public Beta Fastboot ROM

Fastboot process is totally different from Recovery ROM. In fastboot, you need a computer and Mi Flash tool. And in some phone, you need to unlock the bootloader to flash fastboot ROM on MIUI phones.
Here is the complete tutorial to flash the MIUI 10 Fastboot ROM. Download the MIUI 10 Fastboot ROM from the downloads section and follow this guide “How To Flash MIUI 10 Fastboot ROM on Xiaomi Phones
So this way you can install MIUI 10 ROM on your phones. If so, are you excited to test out the MIUI 10 Public Beta ROM? Let us know in the comments below.
Share:

Install Google Pixel 3 Camera Without Root on MIUI 10 Redmi Note 5 Pro

Install Google Pixel 3 Camera Without Root on MIUI 10 Redmi Note 5 Pro

Here in this guide, we will show you how to Install Google Pixel 3 Camera Without Root on MIUI 10, MIUI 9 Redmi Note 5 Pro without losing the ability to receive MIUI OTA Update. Recently Google launched the Google Pixel 3 phone which comes with the new Pixel 3 Camera. The camera has some advanced features like Night Mode, Slow motion and new UI. So many of the other android user want to install the same on the phone. But many of them have to root the phone to install this Google Pixel 3 camera mod on the phone. But in this guide, you don’thave to root or install TWRP on the phone. All you have to run some commands and you are ready to go.
The guide is pretty simple and all its take windows PC, ADB drivers, Unlock Bootloader, some File and some patience. The best part of this guide this will work on any xiaomi phone which is running on the MIUI 9 or MIUI 10. And yes you will get the OTA updates after this and you can install them without any problem. In this guide, we will boot the TWRP temporarily to run some ADB command to enable Camera2API on the phone so you can install the Google camera.
Google Pixel 3 Camera without root
And this will not break the OTA updates on your phone. You will get all the updates. We did the same on our Redmi Note 5 pro and also updated the phone with the latest OTA update. You can check the Video at the end of the post for the reference. So without wasting the time lets get started and enable Camera2API without root or TWRP and Install Google Pixel 3 Camera Without Root
Table of Contents [show]

Install Google Pixel 3 Camera Without Root

We tested this method on our Redmi Note 5 pro and it works without any problem. Read all the instructions very carefully and follow all the steps one by one on your phone. Don’t skip any step otherwise, you will not able to run the Google Pixel 3 camera on your phone.

Download File to Install Pixel 3 Google Camera

1. Download the ADB drivers here on your PC and install the same on your phone.
2. Now download these Fastboot files Platform tools folder here and unzip the folder on your desktop.
3. Download the TWRP image file for Your Phone Here. No need to Install the TWRP, we have to boot it temporarily to run some ADB commands.
4. Download Google Pixel 3 camera apk file here to install Google Camera on your MIUI phone.

Steps to Install Google Pixel 3 Camera Without Root on MIUI 10 Redmi Note 5 Pro

1. Make Sure that your phone’s bootloader is unlocked.
2. Now install the ADB drivers on your Windows PC and Unzip the platform tool folder on the desktop.
3. Now boot your phone in the Fastboot mode. To do this first tutne off your phone and now hold down thr Volume Down + Power Buton together.
4. Open the Platform tools folder that you unzipped on your desktop in Step 2.
5. Now press and hold ‘shift’ key and right-clicked anywhere in the folder and select ‘Open command window here.’
open-command-window-here
5. Now the phone is in the fastboot mode, Coonect it to the PC and enter the following command to boot the phone in twrp.
fastboot boot twrpfilename.img
Thsi will help you to boot your phone in TWRP mode.
6. Once you are in TWRP. Don’t make any changes or don’t do anything on the phone.
7. Now run the following command one by one winodws to enable Camera2API without ROOT.
adb shell
setprop persist.camera.HAL3.enabled 1
setprop persist.camera.eis.enable 1
exit
adb reboot bootloader
fastboot reboot
8. Now the Camera2API is enabled and TWRP is removed from your phone.
9. Now install the Google Pizxel 3 Camera apk file on you rphone.
10. Now the Google Camera is installed on your phone.
Congratulations! You have enabled Camera2 API without losing the ability to receive MIUI OTA Update since you do not flash any custom recovery.
Share:

Popular

Blog Archive

Tags

लेबल

Breaking

Recent In Internet

Recent Post

LightBlog

Recent

लेबल

Unordered List

  • Lorem ipsum dolor sit amet, consectetuer adipiscing elit.
  • Aliquam tincidunt mauris eu risus.
  • Vestibulum auctor dapibus neque.

Pages

Theme Support

Need our help to upload or customize this blogger template? Contact me with details about the theme customization you need.